 16514
16514
How to change where your screenshots are saved on macOS Mojave or later
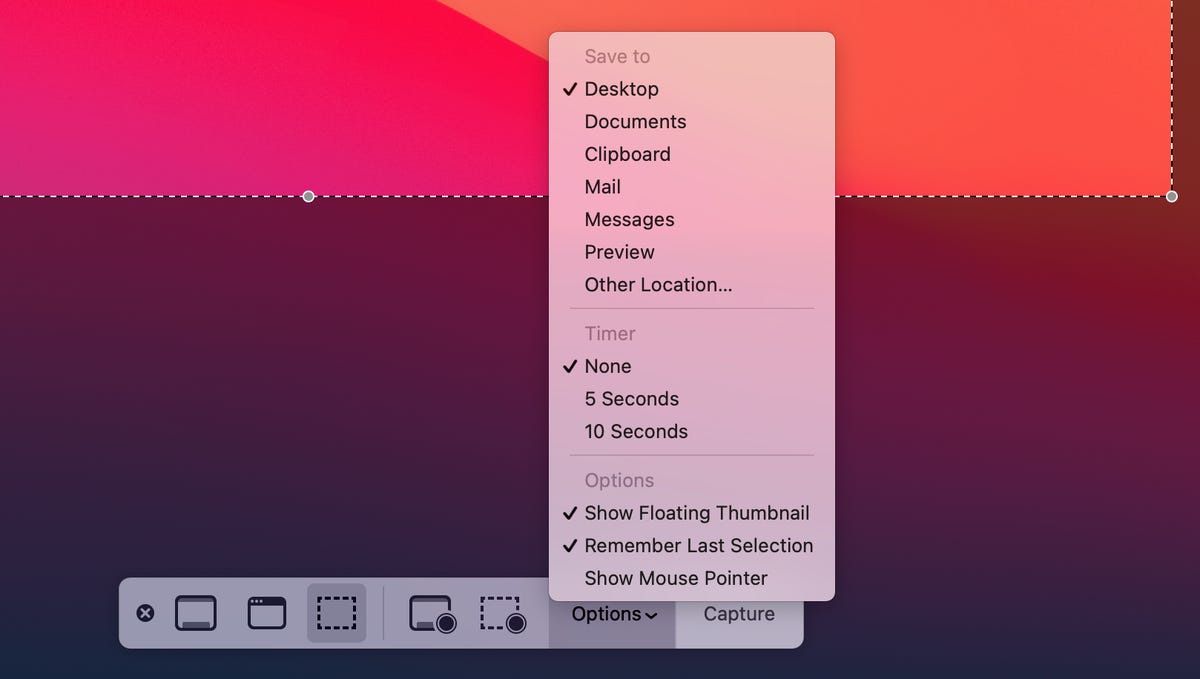
1. On your keyboard, hit Command + Shift + 5.
2. Click Options in the screenshot menu at the bottom of the screen.
Underneath Save To, you should see a checkmark next to Desktop.
You can choose other options, including Documents, Downloads, Clipboard, etc.
If you want to select another folder not shown in the list, you can just click Other Location and find the folder
you wish your screenshots to be saved to in Finder.

How to change where your screenshots are saved on MacOS High Sierra or earlier
If you're running macOS High Sierra or earlier, you'll have to use the Terminal application to change where
your screenshots are saved.
Note: You can use Terminal if you know what you're doing. You can cause a lot of unintentional trouble with the Terminal.
To start, launch Terminal and type in the following:
defaults write com.apple.screencapture location
After typing "location," you'll need to enter a space and then type the path to whatever folder you want your screenshots
to live in from now on. The easiest way to do this is to find the folder in Finder and drag and drop it into Terminal. For example,
if you pulled the Downloads folder into Terminal, you'd see Users/username/Downloads as your folder path. Once the command is correct,
hit Enter on your keyboard, and your screenshots will be saved to that new folder.
You can manually type in the path if you can't drag a folder into the Terminal. If you don't know the path, you can go to the folder, right-click it, and hit Get Info.
You'll see the path next to Where starting at /Users. Also, if you want to go back and have your screenshots saved to your desktop, use ~/Desktop as the path in the command above.


