

 2794
2794
Mail Merge lets you send customized emails to multiple recipients from a single Word document and a contact list (such as an Excel spreadsheet). Word handles the merge, while Outlook sends the emails.
Requirements
-
Microsoft Word and Outlook for Mac (desktop app)
-
Microsoft Outlook for Mac (desktop app) is installed, and Outlook is configured as the Default email reader
To make Outlook your default email on Mac, open the Apple Mail app, go to Mail > Settings/Preferences > General, and set "Default email reader" to Microsoft Outlook in the dropdown menu
Step 1: Create Your Email Template in Microsoft Word
-
Type the email message you want to send.
-
Leave space where personalized information (such as names or organizations) will be inserted later.
Step 2: Prepare Your Recipient List in Microsoft Excel
-
Create a spreadsheet with your recipient information.
-
Ensure the top row contains column headers (e.g., Name, email, Event_Name) to help Word correctly identify the data.
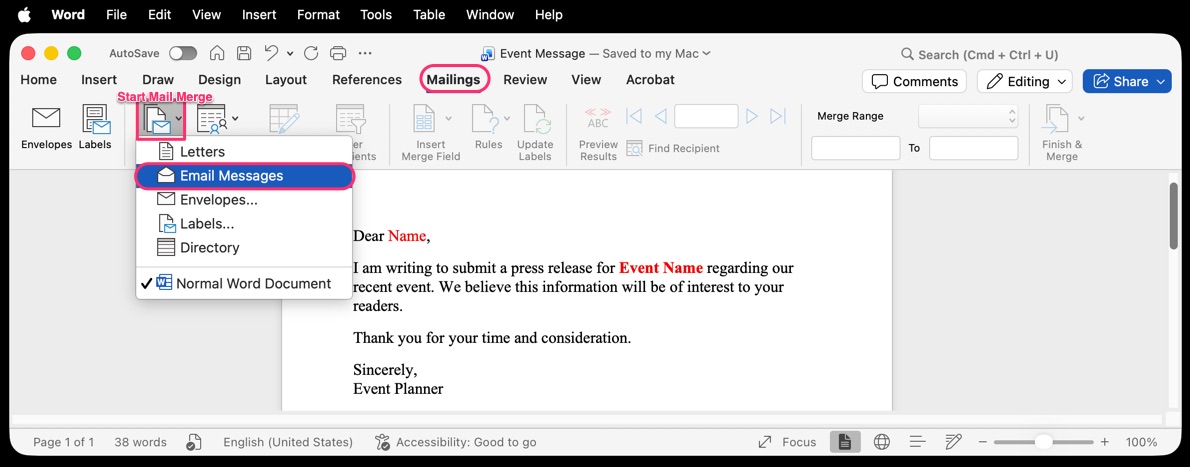
Step 3: Start the Mail Merge in Word
-
In Word, open your email document.
-
Select the Mailings tab from the top menu.
-
Click Start Mail Merge.
-
Choose Email Messages from the dropdown menu.
-
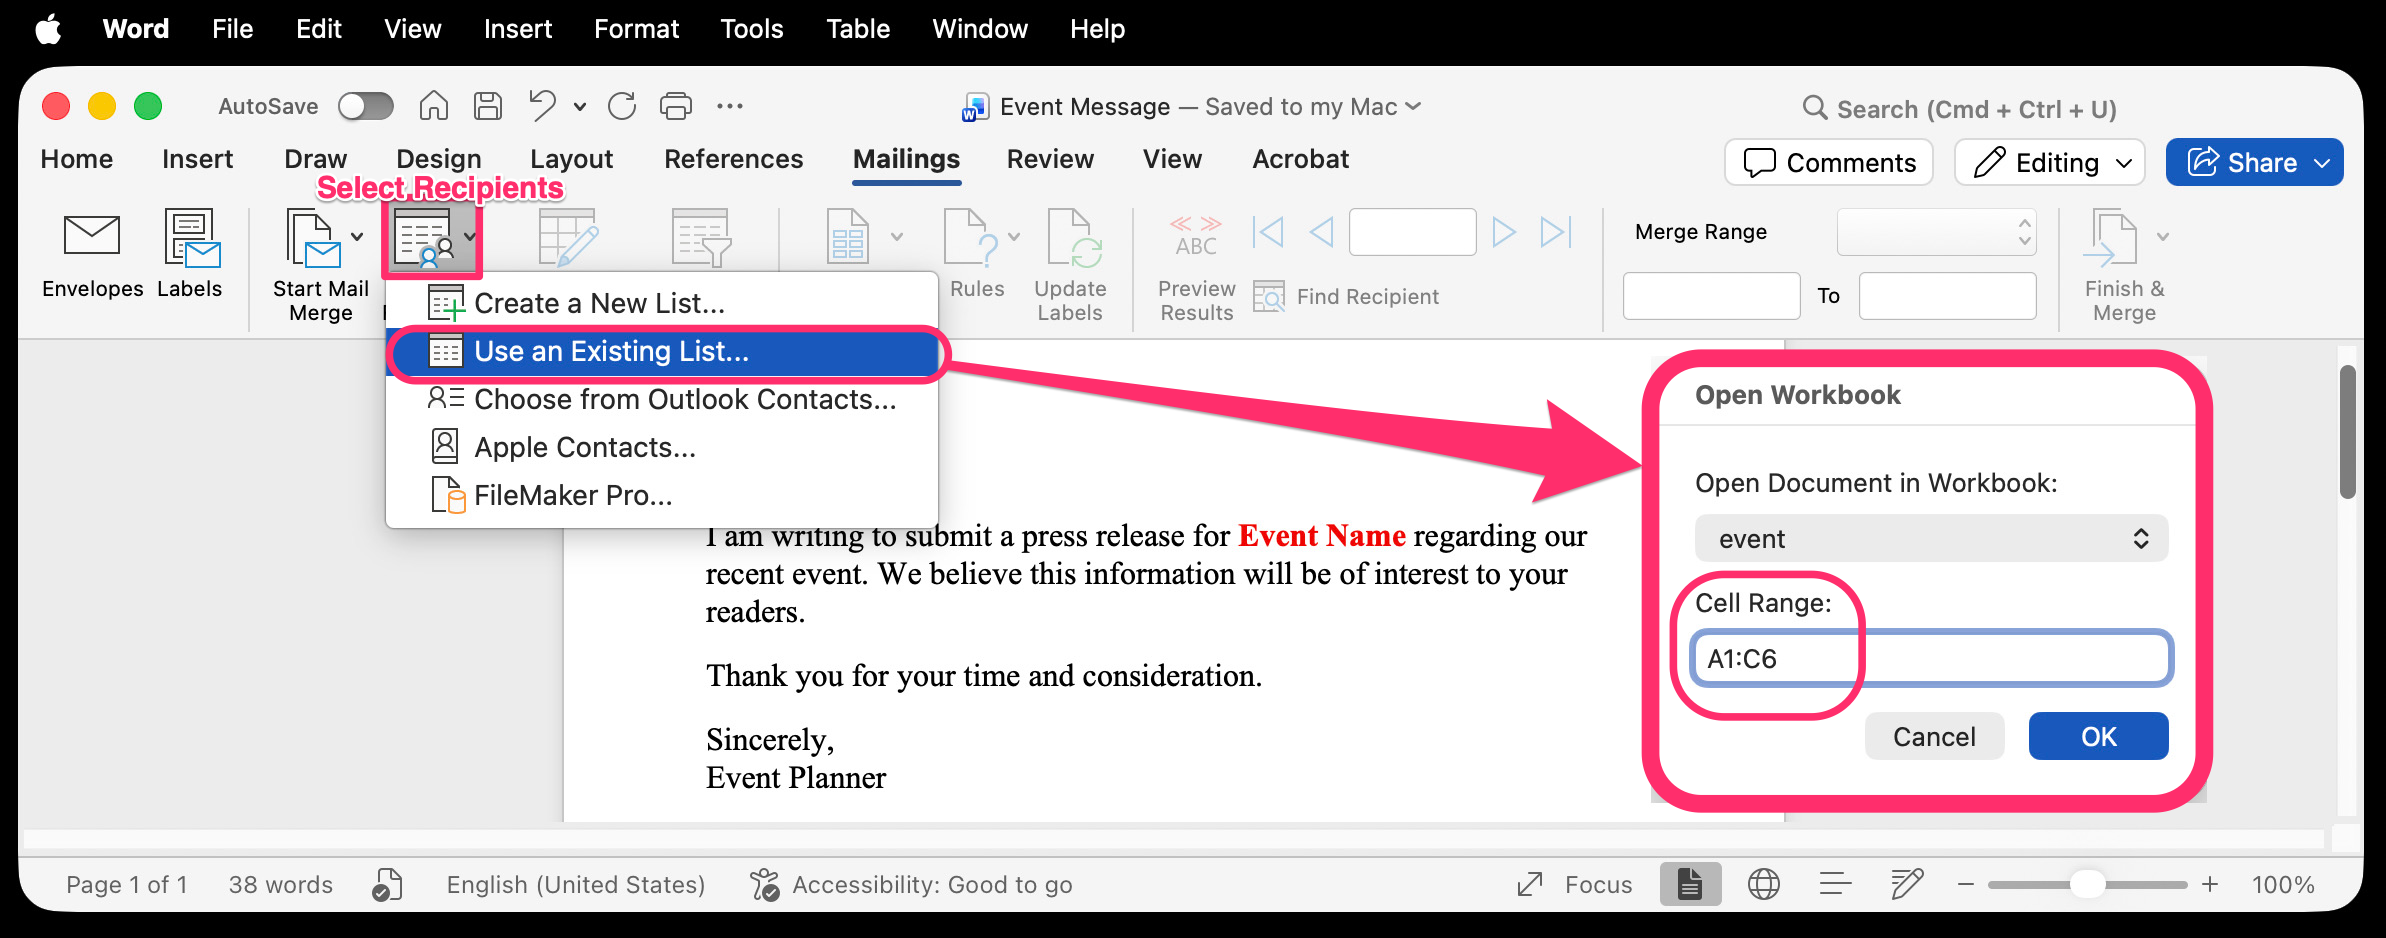
Step 4: Select Your Recipient List
-
Click Select Recipients.
-
Choose Use an Existing List.
-
Browse to your Excel file and open it.
-
When prompted:
-
Confirm the correct worksheet is selected.
-
Enter Cell Range
-
-
Click OK.
-
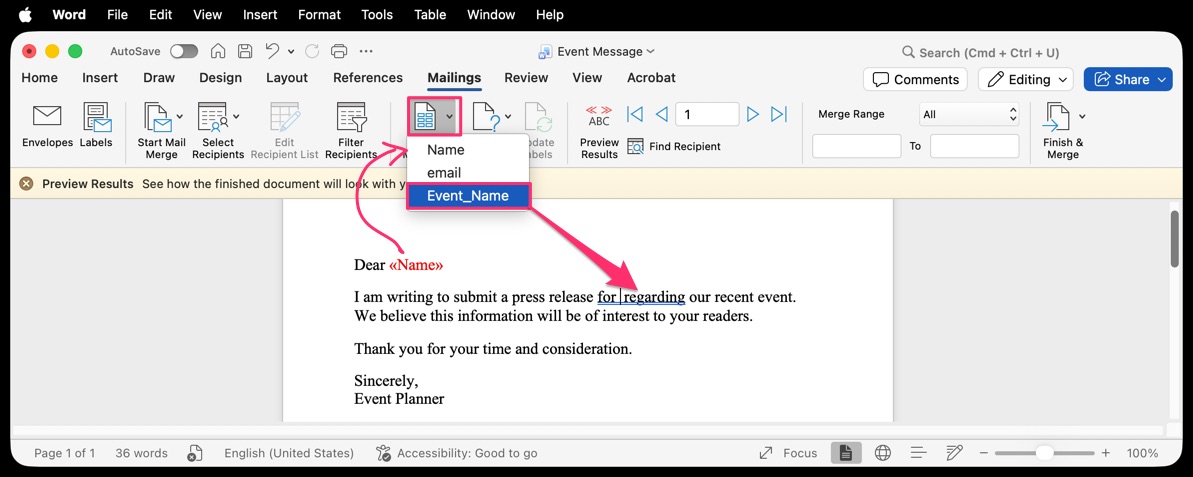
Step 5: Insert Mail Merge Fields
-
Place your cursor where you want personalized text to appear.
-
Click Insert Merge Field.
-
Select the appropriate field (for example, Name).
-
Repeat as needed for additional fields.
-
Add spaces or punctuation manually between fields (for example: Name or Event Name).
-
-
Step 6: Preview the Emails
-
Click Preview Results in the Mailings tab.
-
Use the navigation arrows to review how the email will look for different recipients.
-
Verify formatting and personalization for accuracy.
Step 7: Complete the Mail Merge and Send Emails
-
Click Finish & Merge.
-
Select Send Email Messages.
-
In the dialog box:
-
To: Select the column containing email addresses.
-
Subject line: Enter your email subject.
-
Mail format: Leave set to HTML (recommended).
-
-
Click OK to send.
-
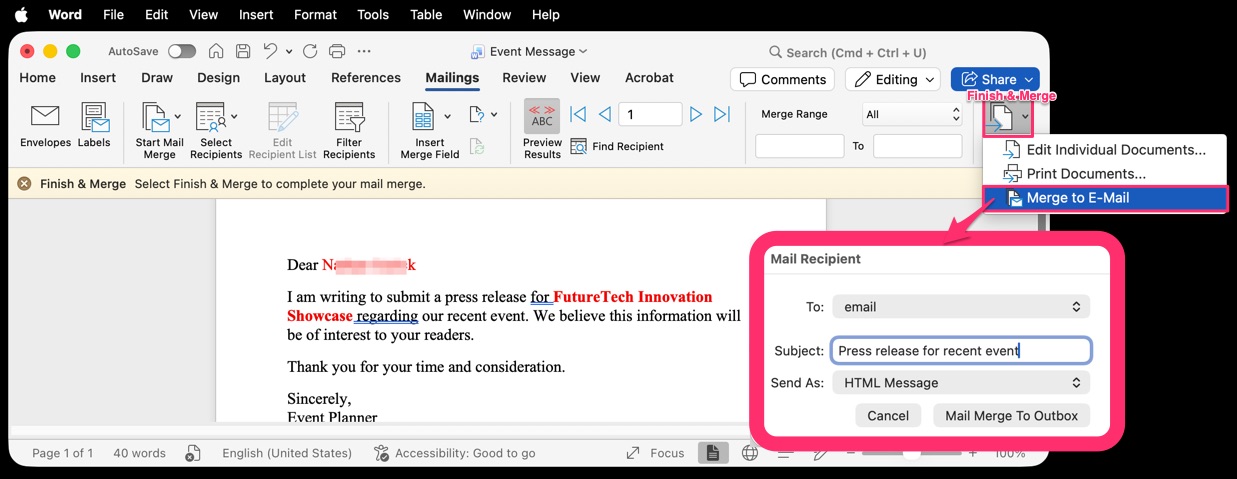
Word will process the mail merge and send the emails through Outlook for Mac.
Important Notes & Limitations
-
Attachments: Microsoft Word’s built-in mail merge does not support sending attachments.
-
Outlook Required: Emails are sent via Outlook. You can monitor delivery in Outbox or Sent Items.
-
Large Sends: For large recipient lists, emails may be sent in batches depending on Outlook and server limits.


